


In 3D printing, surface quality is one of the primary criteria, along with dimensional accuracy and mechanical strength. Even with a well-calibrated machine and high-quality material, the layer lines remain visible. This is an inherent characteristic of additive processes, but it is not unavoidable.
3D print smoothing encompasses all techniques that improve the surface appearance of a printed part, whether before, during, or after printing. Some methods act directly at the slicer level, while others involve mechanical or chemical post-processing. The choice depends on the material, the final use of the part, and the desired level of finish.

Planning smoothing from the slicer: settings that make all the difference
Before reaching for sandpaper or solvents, it is essential to understand that the best smoothing often starts upstream.
Many surface issues do not come from the material or the machine, but from inappropriate slicer settings. A part well-planned at this stage will require much less post-processing.
Layer height: the fundamental compromise
Layer height is one of the most obvious parameters but also one of the most misunderstood. A high layer height speeds up printing but makes the lines more visible. A lower layer height improves visual appearance but significantly increases print time.
In practice, always going down to 0.1 mm is not always relevant. On some geometries, a well-chosen intermediate layer height produces a more uniform finish than an extreme setting.
Moreover, not all areas of a part require the same level of detail. This is where a smarter approach comes into play.
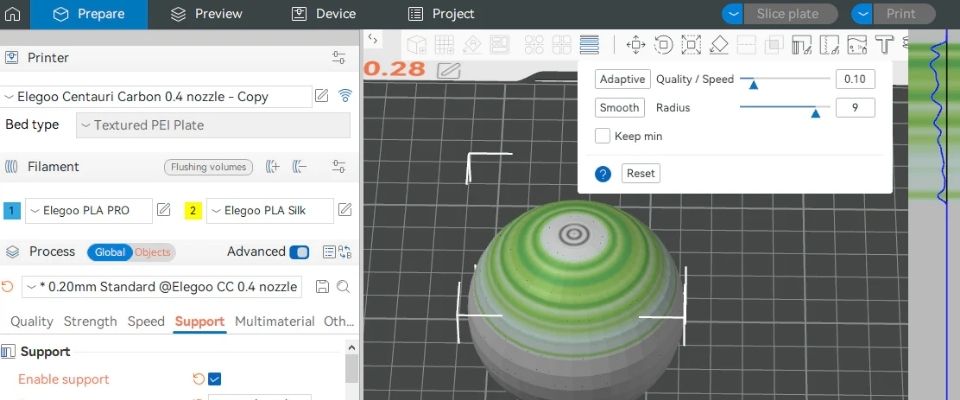
Variable layer height: smoothing without unnecessarily increasing print time
Modern slicers offer adaptive or variable layer height functions. The principle is simple:
- – thin layers on curves, rounded areas, and visible surfaces
- – thicker layers on flat or less exposed surfaces
This strategy achieves a visually smoother result without a significant penalty on total print time. It is especially effective for organic, decorative, or ergonomic parts.
Used correctly, this approach already significantly reduces the need for post-print sanding.
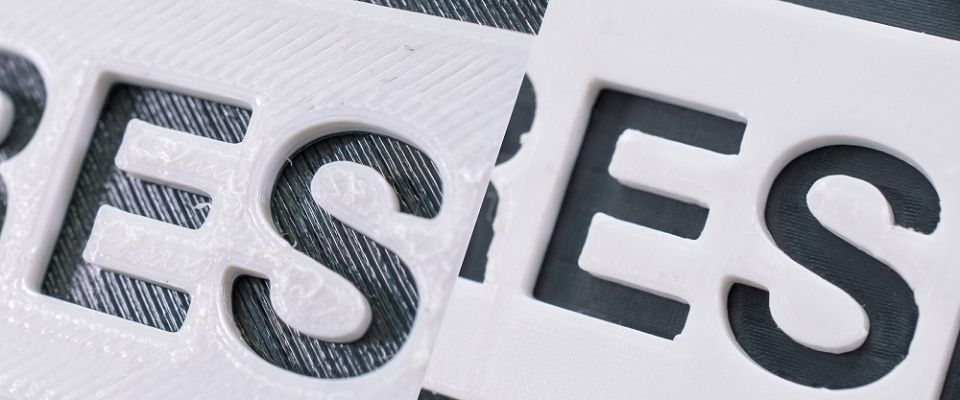
Ironing: smoothing top surfaces
Ironing is a specific function for horizontal top surfaces. After the last layer, the nozzle slightly passes over the surface, extruding very little material, or sometimes none at all.
Result:
- – infill lines partially disappear
- – the surface becomes more uniform to the touch
- – visual appearance is greatly improved
This technique is particularly effective on materials like PLA, but it must be used with care. Poorly adjusted ironing can cause blobs, overly shiny or uneven surfaces, or a significant increase in print time.
It is therefore recommended to test this option on simple parts before applying it to more complex objects.
Mechanical precision and extrusion: the often overlooked basics
No software setting can compensate for poorly calibrated extrusion, a partially clogged nozzle, moist or inconsistent 3D filament.
Over-extrusion accentuates surface defects, while under-extrusion creates micro-gaps that are impossible to fix later. Before attempting smoothing, ensure that everything is clean, consistent, and controlled.
Mechanical smoothing: simple methods, gradual results
Once the part is printed, mechanical smoothing remains the most universal method. It is compatible with most materials but requires time and diligence.
Sanding: the most common method
Sanding is often seen as basic, but when done properly, it yields very clean results.
The key is to proceed in stages:
- coarse grit to remove visible lines
- intermediate grits to homogenize the surface
- fine grits to achieve a smooth touch
It is generally preferable to wet sand with fine grits, which limits plastic heating and improves uniformity.
This method works particularly well on PLA, PETG, ABS, and some nylons, although nylons require more patience.
The main drawback is the time required, especially for complex or highly detailed parts.
Heat surface fusion: a delicate approach
Some smoothing techniques use a heat source, such as a heat gun or torch, to slightly melt the outer layers. This approach reduces visible layer lines and gives the part a more uniform surface.
In addition to improving visual appearance, heat can give the part a slight glossy effect, which can be interesting for decorative prints or visual prototypes.
However, this method carries significant risks. Poorly controlled heat can warp the part, cause loss of fine details, or create bubbles and localized burns on the material.
For these reasons, using a heat gun or torch requires precision and prior experience. It is therefore not recommended for functional parts requiring high dimensional accuracy and is mainly reserved for decorative or experimental prints.
Painting: a finishing step in its own right
Painting is often associated with smoothing, but it is actually a distinct post-processing step. It helps hide residual imperfections, unify the surface, and provide an aesthetic finish.
However, a poorly prepared part will still show under paint. Mechanical or chemical smoothing beforehand remains essential. Find more information on painting 3D prints in our dedicated article.
Chemical smoothing: maximum efficiency, real constraints
Chemical smoothing uses solvents that can soften the plastic surface, allowing layers to partially fuse together.
This method often provides the best visual results, but it is neither universal nor risk-free.
Chemical smoothing and material compatibility
Not all plastics react the same way to solvents. Some are very reactive, others almost insensitive.
The principle remains the same:
- – controlled exposure to vapors or solvent
- – superficial fusion of the material
- – solidification with a smoother surface
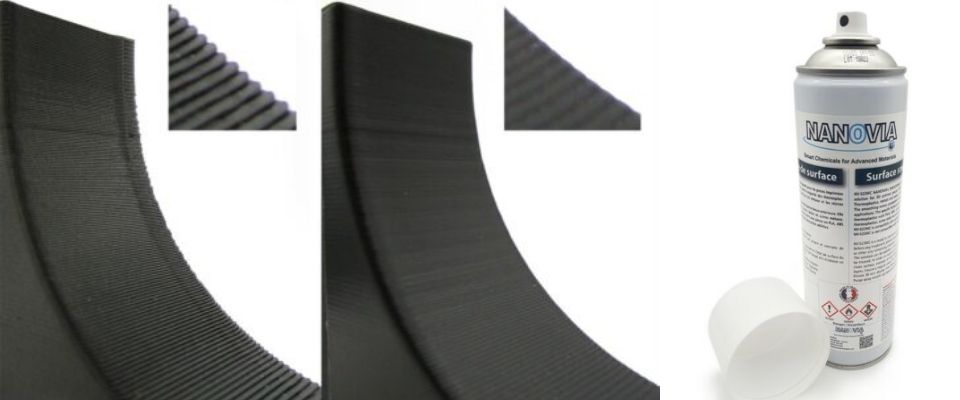
This technique can produce very smooth surfaces, but it also slightly alters dimensions and fine detail accuracy. Ready-to-use products like Nanovia smoothing solutions are easy to use and specially designed for 3D-printed parts.
Advantages and limits of chemical smoothing
Chemical smoothing allows for a very uniform surface finish by visually eliminating layer lines without mechanical abrasion. It is particularly suitable for aesthetic parts or visual prototypes, especially when geometry includes areas difficult to sand.
However, using solvents requires specific precautions and may cause slight loss of detail or dimensional accuracy, limiting its use for functional parts.
Choosing the right method according to the part’s use
There is no universal smoothing method. The right choice always depends on the final objective:
- – functional prototype: optimized slicer settings and light sanding
- – aesthetic part: combination of sanding and advanced finishing
- – decorative object: chemical smoothing possible depending on the material
- – mechanical part: avoid methods that alter dimensions
In all cases, a gradual approach remains the most reliable. Moreover, modern machines already produce relatively smooth parts by default. The need for extreme smoothing will then depend on the final application.
Conclusion: smoothing is a matter of strategy more than technique
3D print smoothing is not an isolated step, but a set of coherent technical choices, from file preparation to final post-processing. If you want a focus on possible software optimizations, feel free to leave a comment.
The best results are obtained when the geometry is designed for printing, slicer settings are adapted to the part, and post-processing is chosen according to the material and intended use.
Rather than looking for a miracle solution, it is often more effective to intelligently combine several approaches, always prioritizing starting quality.
✅ Why Choose Polyfab3D?
Premium Support and After-Sales Service: Starting from your needs, we will guide you to the most suitable solution and provide long-term support for its implementation and daily use.
Official Reseller: Polyfab3D is a certified reseller of top brands, ensuring you get official products, exclusive access to the latest innovations, and priority technical support.
Fast Delivery and Customer Satisfaction: Polyfab3D is committed to providing you with an optimal and fast experience. Positive feedback from our customers rewards us and proves the reliability and efficiency of our service.
Contact us now for a personalized recommendation tailored to your needs, budget, and ambitions.